Home EV charger installation for two cars comes down to choosing one dual-port charging station or two separate wall-mounted units. A dual-port station shares a single power feed and splits output between both vehicles, while two separate units give each car its own dedicated circuit and full charging speed but draw more from your electrical panel.
A single Level 2 charger typically needs a 40- to 60-amp dedicated circuit.
Load management systems throttle charging when home demand spikes, allowing two cars to charge without a service upgrade.
Two wall-mounted units on opposite sides of a two-car garage keep each cable at its own parking spot.
A building permit and inspection add a fixed cost per project and are required for a legitimate installation.
Moser Electric has over 21 years of experience with residential and commercial electrical work.
Two EVs, one panel: can your home handle it?Moser Electric handles load calculations, panel upgrades, and two-car charger installation across the region.
Dual-Port Charging Stations vs. Two Separate Units
Home EV charger installation for two cars comes down to one early decision: one dual-port charging station or two separate wall-mounted units. A dual-port station shares a single power feed and splits output between both vehicles. Two separate units give each car its own dedicated circuit and full charging speed, but they draw more from your electrical panel. Homeowners in Moneta and the surrounding region can review this trade-off with a qualified electrician before any equipment is ordered.
How Simultaneous and Sequential Charging Differ
Simultaneous charging splits available power across both ports at once. Sequential charging, common in power-sharing systems, gives one vehicle full output and switches to the second when the first finishes. A dual-port unit with power sharing handles two overnight sessions without tripping a breaker, while two independent Level 2 chargers can run at full amperage together only if your service and panel support the combined load. For most two-car households, the practical question is not which charger is faster. It is how much capacity your home can actually deliver.
Setup
Power Feed
Best For
Main Trade-off
Dual-port station (power sharing)
One dedicated circuit
Tight panels, one-wall garages
Slower when both charge at once
Two separate Level 2 units
Two dedicated circuits
Two high-mileage EVs
Higher panel and labor demand
Dual-port, sequential
One circuit
Overnight top-ups
One car waits its turn
Electrical Panel Upgrade for EV Charging: When Two Cars Force the Issue
An electrical panel upgrade for EV charging becomes necessary when the combined load of two chargers pushes your service past its rated capacity. A single Level 2 charger typically needs a 40- to 60-amp dedicated circuit. Two of them can demand more than an older 100-amp service can spare alongside a home’s existing appliances. That is the point where a panel upgrade, a load management system, or a shared dual-port setup decides the project.
Load Calculations for Older Homes
Older homes often carry panels and wiring installed decades ago. A proper electrical load calculation accounts for existing square footage, major appliances, heating and cooling, and the new EVSE load before a design is chosen. The calculation, not the charger spec sheet, is what determines whether a service upgrade is needed.
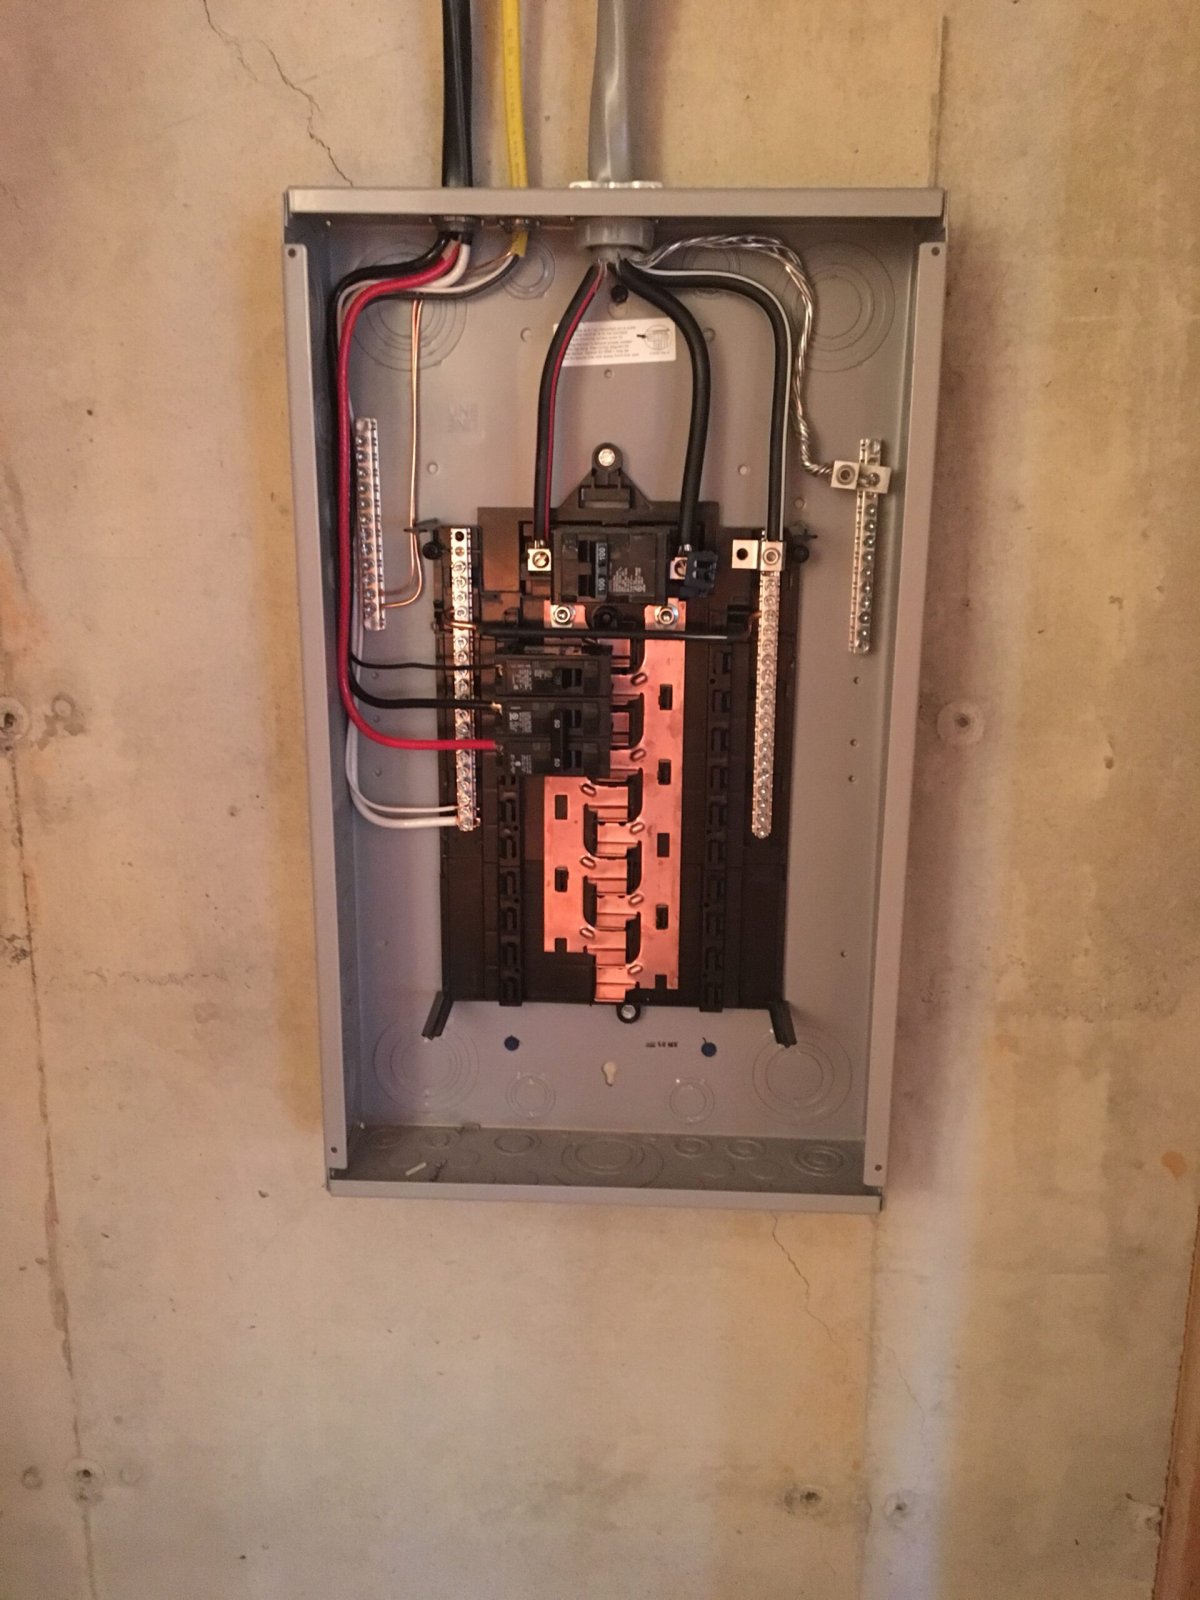
A residential electrical panel with its cover removed, showing circuit breakers, copper busbars, and neatly routed wires inside a gray metal enclosure mounted on a concrete wall.
EV Charger Load Management Systems That Share Power Safely
EV charger load management systems monitor a home’s total electrical draw and throttle charging when demand spikes, so two cars can charge without a service upgrade. The mechanism matters more than the marketing: current transformers clamp around the service conductors at the panel, a controller reads whole-home demand continuously, and it signals the EVSE to reduce amperage in real time. When the dryer, range, or heat pump cycles on, charger output drops; when the house quiets down, charging ramps back up. The result is safe simultaneous charging on a service that could not otherwise support two Level 2 units at full amperage.
Load management can be a practical option on older homes with limited panel capacity, where a service upgrade would otherwise be needed. Whether it is cheaper than an upgrade depends on the specific home and its load calculation.
Panel-level monitoring: current transformers track whole-home demand and cap charger output dynamically, so the service never exceeds its rating
Power sharing between ports: a dual-port station splits a single circuit between two vehicles, which is the simplest path when only one breaker space is available
Smart scheduling: chargers default to off-peak hours to reduce strain and take advantage of lower utility rates
Hardwired connection: most load management setups are hardwired for reliability, and hardwiring is generally required for the controller itself
Load management does not make charging faster. It can make two-car charging possible on a panel that would otherwise need replacement. If your load calculation shows headroom, two independent circuits remain the simpler long-term design.
Load management hardware should be listed and installed per the manufacturer’s instructions and the adopted electrical code, and the controller must be wired to the service it is monitoring.
Home EV Charger Installation Cost: Equipment, Labor and Panel Work
Home EV charger installation cost for two cars generally breaks into four line items: equipment, circuit labor, panel or service work, and permitting. Here is how each line item typically behaves on a two-car project.
Equipment. A basic wall-mounted Level 2 unit is the lowest-cost option. A dual-port station with power sharing costs more up front but can eliminate a second circuit run. Two separate Level 2 units cost the most in equipment but give each car full amperage.
Circuit labor. Labor covers conduit, conductor, the breaker, and either a NEMA 14-50 outlet or a hardwired connection. The two variables that move this number most are run distance from the panel to the parking spot and whether the run is surface-mounted conduit in a garage or fished through finished walls. A short surface run in an attached garage is the low end; a long buried run to a detached carport is the high end. Hardwired installs avoid the cost of a 14-50 receptacle but add a disconnect in some configurations.
Panel and service work. When it is needed, this can be a significant line item. A panel upgrade or a new service can exceed the combined equipment and labor cost of the chargers themselves. Load management is an alternative to a service upgrade: a controller and current sensors throttle charging to stay within existing capacity.
Permitting. A building permit and inspection add a fixed cost per project and are required for a legitimate installation. Skipping the permit saves money up front and creates a problem at resale or insurance claim time.
Because every home’s load calculation differs, pricing depends on panel condition, run distance, and equipment selection. For current pricing or a quote, contact Moser Electric directly through its website. Homeowners who want to understand the panel side of the quote first can explore panel upgrade services or read more about how an electrical panel upgrade protects your home.
Watch out: a quote that lists only charger equipment and labor, with no load calculation and no panel line item, can leave a two-car project under-scoped.
Garage, Carport and Conduit Planning for Two Charging Spots
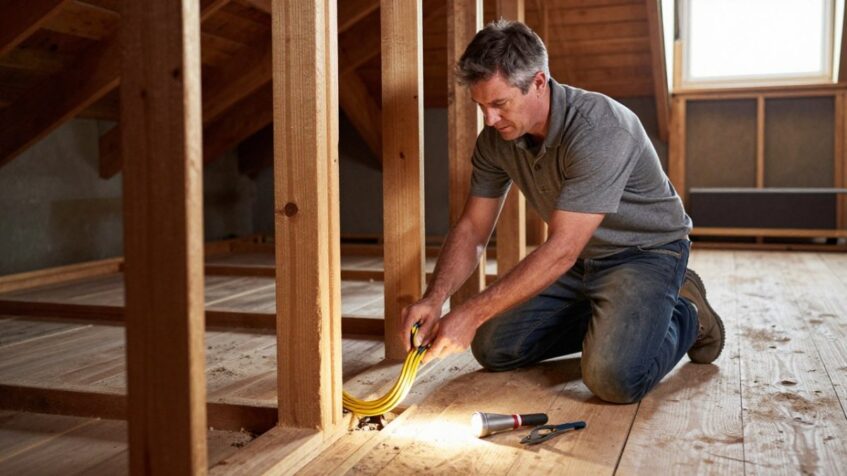
Garage and carport layouts affect where chargers mount and how cable management works day to day. Two wall-mounted units on opposite sides of a two-car garage keep each cable at its own parking spot. A single dual-port station on the shared wall works when cars park side by side. Conduit installation along the wall or through the attic keeps wiring protected and neat, and a hardwired setup avoids exposed outlets at bumper height. Voltage drop over long runs from the panel to a detached carport is a real planning factor, so we size conductors for the distance, not just the amperage.
The man is American.
Permits, Code and Virginia Utility Rebates for Two-Car Charging
Building permits and local code compliance are part of every legitimate EV charging station installation. A dedicated circuit for each charger, proper grounding, and ground fault circuit interrupter protection are standard requirements, and an inspector signs off before the circuit is energized. Utility rebate programs for home charging change periodically, so homeowners should check their utility’s current program page for details. For climate-specific planning, weather-rated equipment and secure conduit are worth considering for any exterior carport run.
Scheduling Your Two-Car Charger Installation with Moser Electric
Moser Electric has over 21 years of experience with residential and commercial electrical work, and offers full-service electrical solutions. For current pricing or to schedule an assessment, contact Moser Electric through its website. Homeowners searching for an electrician near me in the Moneta area can reach our Lynchburg service team or connect with our Bedford electrician team to book an assessment. Before you commit, you can also read client reviews to see how we work in people’s homes.
Two cars and one panel is a solvable problem, but only when someone runs the numbers first. Moser Electric brings more than two decades of full-service electrical experience to every charger project, from load calculations and panel upgrades to hardwired installations and generator work, with recommendations tailored to your home and a respectful presence throughout. Get started with Moser Electric and charge both vehicles safely on a system built to code.
Frequently Asked Questions
Can a single home EV charger charge two cars?
A single-port charger charges one car at a time, so two cars means either taking turns or adding a second unit. A dual-port charging station solves this by splitting power between two cables, though most models share the available amperage rather than delivering full speed to both at once. If both drivers need a full charge overnight, two dedicated circuits or a load management system is usually the better fit.
Do I need a panel upgrade to install two EV chargers?
Not always. An electrician runs a load calculation on your existing service first. If the panel has spare capacity, two 240-volt circuits can often be added without upgrading. Older homes with 100-amp service frequently do need an electrical panel upgrade for EV charging, especially when other large loads like electric heat or a hot tub are present. A load management system can sometimes avoid the upgrade by pausing charging when demand peaks.
What does home EV charger installation cost include?
Home EV charger installation cost depends on the charger itself, the length and route of the circuit, whether the unit is hardwired or uses a NEMA 14-50 outlet, and any panel work required. A straightforward install near the panel costs far less than a long conduit run across a garage or a service upgrade. For current pricing or a quote, contact Moser Electric through its website.
Can Moser Electric handle permits for an EV charger installation in Moneta?
Permits and inspections are required for a legitimate EV charger installation. Confirm with your local building department what is required for your project.
Hiring an electrician for a dead outlet is usually worth it, because the cause often sits behind the wall in a loose connection, damaged wiring, or a failing panel. A diagnostic visit tells you which repair you actually need before you authorize work.
Test the outlet with a known-working device, check for a tripped breaker, press GFCI reset buttons, and flip wall switches first.
Stop and call a pro if you see scorch marks, smell burning, or feel heat at the outlet.
A dead outlet usually falls into one of five buckets, from a tripped GFCI to a panel issue.
Ask for the cause in writing so a bundled quote cannot hide whether you pay for a reset or a rewire.
Hire a licensed electrician for cracked, ungrounded, or discolored outlets and for homes with aluminum wiring.
Dead outlet? Here’s what to check first.Moser Electric diagnoses and repairs dead outlets across Moneta and Lynchburg, VA.
A dead outlet is one of the most common electrical complaints homeowners raise, and it is also one of the most frequently ignored. Homeowners often write off a single nonworking outlet as a minor annoyance, then plug a space heater into an extension cord across the room and forget about it.
Here is the uncomfortable truth most guides skip: a dead outlet is rarely just a dead outlet. The receptacle itself may have failed, or the problem may sit upstream in a loose connection, a tripped breaker, or wiring that has quietly degraded behind the drywall.
So is hiring an electrician for a dead outlet worth it? Usually, yes, but not always, and the difference comes down to what you find when you troubleshoot safely.
Dead Outlet Troubleshooting You Can Do Safely
Start with the simple, safe checks before you call anyone. Most dead outlet troubleshooting takes under ten minutes and requires no tools beyond a lamp or a small voltage tester.
Work through these in order:
Test the outlet with a known-working device. A lamp or phone charger that works elsewhere tells you the problem is the outlet, not your appliance.
Check for a tripped breaker. Open the electrical panel and look for a breaker that sits between ON and OFF, or one that has flipped fully. Reset it once. If it trips again immediately, stop and call a pro.
Look for a GFCI reset button. Outlets in kitchens, bathrooms, garages, and outdoors are often protected by a GFCI outlet upstream. Press the RESET button on any GFCI in the area; a tripped GFCI can kill power to several downstream receptacles.
Test the switch. Many outlets are controlled by a wall switch. Flip every switch in the room before assuming the receptacle has failed.
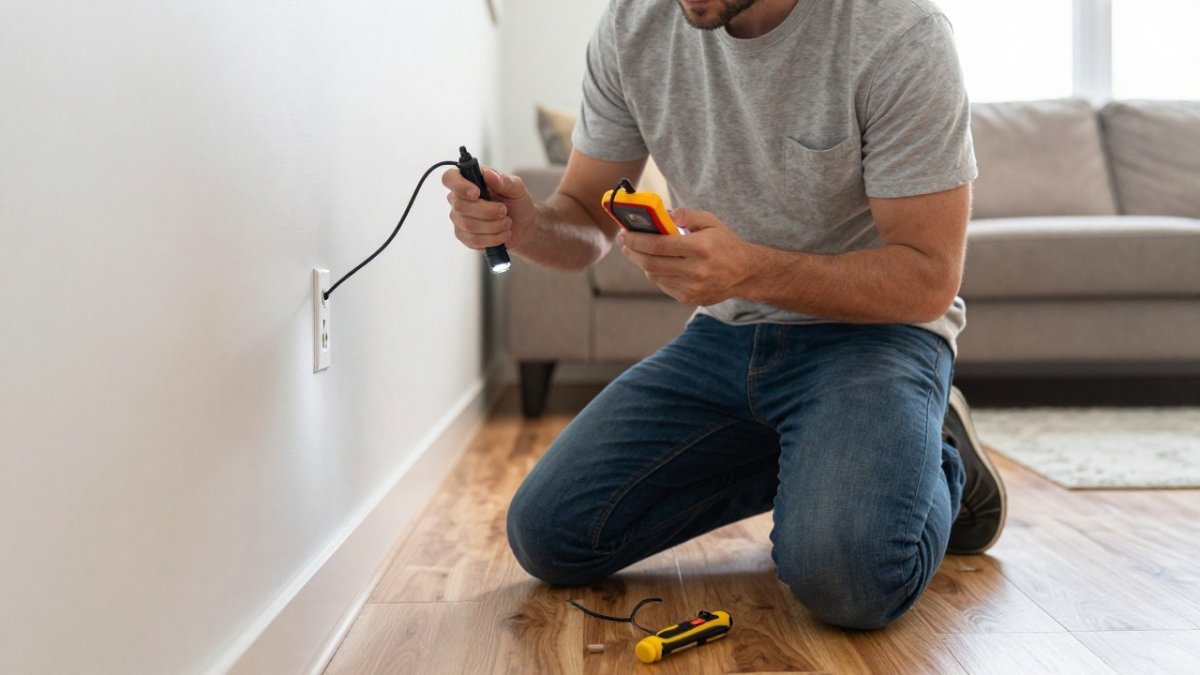
Homeowner using a voltage tester and flashlight to troubleshoot a dead outlet in a living room
What most guides miss is step three. A dead outlet in a bedroom can trace back to a tripped GFCI in the bathroom on the same circuit, and resetting it restores power in seconds. If all four checks come up empty, the problem lives behind the wall, and that is where DIY work should end.
Signs of Faulty Wiring That Mean Stop and Call a Pro
Some symptoms point to faulty wiring rather than a failed receptacle, and those are not DIY territory. Stop troubleshooting and call a licensed electrician if you notice any of the following:
A burning smell near the outlet or panel
Scorch marks, discoloration, or melted plastic on the receptacle
Sparks when you plug something in
The outlet or faceplate feels warm or hot to the touch
Flickering or dimming lights elsewhere in the house when the outlet is used
Frequent breaker trips on the same circuit
Buzzing or crackling sounds from the outlet or panel
Each of these signals points to heat, arcing, or a loose connection, and each one is a genuine fire hazard. The U.S. Fire Administration’s electrical fire guidance notes that home electrical fires cause significant injury and property loss every year, and faulty wiring and outlets are recurring culprits. Repeated dead outlets on the same circuit can also point to a failing panel, which is why we often recommend panel upgrades when the symptoms cluster. If your home has older wiring and you want to understand outlet safety devices, our team explains why kitchens and bathrooms need GFCI protection.
DIY vs. Professional Repair: A Side-by-Side Comparison
The honest answer is that DIY makes sense for diagnosis, not repair. Here is how the two paths compare.
Factor
DIY Troubleshooting
Professional Repair
What it covers
Breaker resets, GFCI resets, device testing
Diagnosis, wiring repair, outlet replacement
Tools required
Lamp, voltage tester
Meter, hand tools, code knowledge
Time
10-30 minutes
One service visit
Safety risk
Low if you stop at the panel
Low, handled by a trained electrician
Code compliance
Not addressed
Permits and code checks as needed
Best for
Confirming the problem exists
Fixing anything behind the wall
What the table cannot show is the decision you actually face once you know the cause. A dead outlet is not one repair; it is a fork in the road, and the right path depends on what the diagnosis finds:
Loose connection or failed receptacle. This is the best-case scenario for hiring a pro. The repair is targeted, the parts are inexpensive, and the visit pays for itself by removing a fire risk you cannot see.
Tripped GFCI that will not reset. Replacement of the GFCI device is usually the fix, and it is a code-relevant repair because GFCI protection is required in kitchens, bathrooms, garages, and outdoors.
Damaged wiring in the wall. This is where DIY stops being a money-saver. Opening drywall, repairing a conductor, and restoring the wall is a multi-trade job, and the cost of guessing wrong is a hidden splice that fails inspection or starts a fire.
Circuit or panel issue. A dead outlet that traces back to an overloaded circuit or a failing panel is a symptom of a system problem. Repairing the outlet alone will not fix it.
The risks of incorrect wiring are real: reversed polarity, loose terminations, and overloaded circuits are code violations that can void insurance claims and, worse, start fires. A common pattern is a homeowner who replaces a receptacle and creates a loose connection that heats up under load, which is why calling a licensed electrician for work behind the faceplate is generally advisable.
A handyman is appropriate for cosmetic work and for swapping a like-for-like device where local rules allow it, but a handyman is not the right call for diagnosing a circuit, repairing wiring, or pulling a permit. If your inspection suggests the problem runs through the whole house rather than one receptacle, it helps to understand what whole-house rewiring costs per square foot before you decide between targeted repair and a larger project.
Watch out: a cheap outlet swap that ignores the upstream cause can leave the real hazard in place. If the new outlet also goes dead, stop and get the circuit diagnosed.
What an Electrician Diagnostic Fee Actually Covers
An electrician diagnostic fee is the charge for identifying the cause of a problem, not just looking at it. Electrical contractors commonly charge a service-call or trip fee, and may apply that fee toward the repair or charge a separate diagnostic fee for tracing the circuit.
During a typical visit, the electrician will:
Test the outlet and trace the circuit back to the panel
Check for loose connections at the receptacle and any upstream outlets
Verify breaker and GFCI operation
Inspect for heat damage, arcing, and code violations
Explain the cause and give you repair options before work begins
What separates a good diagnostic visit from a wasted one is the decision criteria it produces. A dead outlet usually falls into one of five buckets, and each has a different repair path:
Tripped breaker or GFCI. The fix is a reset, and the value of the visit is confirming the circuit holds under load. If it trips again, the problem is downstream.
Failed receptacle. The outlet itself has worn out, cracked, or lost tension. Replacement is a small, well-defined repair.
Loose connection at the receptacle or upstream outlet. This is the most common hidden cause. A backstabbed or loosened termination can kill power to everything downstream and is a fire risk until it is re-terminated.
Damaged wiring in the wall. Rodent damage, nail strikes, or degraded insulation require opening the wall and repairing the conductor, which changes the scope and the price significantly.
Circuit or panel issue. A failing breaker, an overloaded circuit, or a panel problem means the dead outlet is a symptom, not the disease.
The diagnostic fee is worth it when it tells you which bucket you are in before you authorize repair. That distinction is what makes hiring an electrician for a dead outlet worth it in most cases: you are paying for certainty, not for a guess.
Watch out: a quote that bundles the diagnostic fee into a repair price without itemizing the diagnosis can hide whether you are paying for a reset or a rewire. Ask for the cause in writing.
When to Hire an Electrician to Replace Outlets
Outlet replacement is appropriate when the receptacle itself has failed, when it is old and ungrounded, or when it shows heat damage. That work involves cutting power at the panel, verifying the circuit is dead, and installing the new device to code, and it is not a job to improvise.
Hire a licensed electrician to replace outlets when:
The outlet is cracked, loose in the wall, or discolored
The receptacle is ungrounded or two-prong only
A GFCI will not reset or trips repeatedly
The outlet is in a wet location without GFCI protection
You are replacing outlets in a home with aluminum or older wiring
A residential electrician will also confirm whether a permit is required, which depends on the scope of work and local rules. If you have decided to bring in a pro, you can see our electrical repair services and book a visit. For homeowners searching for an electrician near me in the Moneta area, a local licensed contractor is the right call, not a general handyman.
Request Service from Moser Electric for Your Dead Outlet
A dead outlet is a small problem with an outsized range of causes, and the cost of delaying repair is rarely just inconvenience. Loose connections worsen, heat damage spreads, and a cheap fix today can turn into a panel replacement later.
Moser Electric provides electrical services for residential and commercial properties, with over 21 years of experience. Our team aims to treat your home or business as a respectful guest.
A dead outlet that keeps tripping, smells hot, or refuses to reset is not a wait-and-see problem.
Frequently Asked Questions
What should I check before calling an electrician about a dead outlet?
Before calling, check the circuit breaker for a tripped switch, press the reset button on any GFCI outlet nearby, and test the outlet with a lamp you know works. Also look for a switched receptacle controlled by a wall switch. If these steps do not restore power, the problem likely involves the wiring or the outlet itself, and a licensed electrician should diagnose it. Never remove the cover plate or probe inside the outlet yourself.
How much does an electrician diagnostic fee cost, and is it worth paying?
Diagnostic fees vary by contractor and region, so ask Moser Electric for current rates when you call. Paying for a professional diagnosis is often worth it, because a proper diagnosis helps prevent replacing a good outlet or missing a hidden fire hazard.
Can a dead outlet be a sign of a bigger electrical problem?
Yes. A single dead outlet can mean a loose connection at that receptacle, but it can also point to a tripped breaker, a faulty GFCI upstream, damaged wiring in the wall, or an overloaded circuit. If the outlet is warm, discolored, or smells like burning, stop using it and call a licensed electrician immediately. Signs of faulty wiring, such as flickering lights or frequent breaker trips, make a professional inspection more urgent.
Do I need a licensed electrician to replace a dead outlet, or can a handyman do it?
In most cases, a licensed electrician should replace a dead outlet, especially if the cause is unknown. Hiring a licensed electrician helps ensure the work meets code and that any underlying wiring issue is found. Ask Moser Electric about licensing and permits before work begins.
Whole house rewiring cost per square foot is a planning shortcut, not a price list, that bundles labor, wire, boxes, breakers, and basic fixtures into one rough number. It assumes open access and no surprises, so it usually leaves out drywall repair, panel upgrades, permits, and concealed conditions like knob-and-tube wiring. Treat the figure as a starting point and replace it with a written scope.
A square-foot rate generally covers standard labor, wire, outlets, switches, breakers, and basic fixture wiring.
Common exclusions include drywall or plaster repair, permits and inspection fees, and specialty fixtures.
Finished-wall retrofits cost more in labor hours than open-stud work because cable must be fished and patched.
A whole-house rewiring timeline usually runs from several days to a few weeks depending on size and access.
Whole-house rewiring permits and inspections in Virginia are required, and the permit creates an inspected record of the work.
What will rewiring your home actually cost?Moser Electric provides clear, written rewiring estimates for homes across the region.
How Whole House Rewiring Cost Per Square Foot Is Actually Calculated
Whole house rewiring cost per square foot is a planning shortcut, not a price list. It gives you a rough starting number before anyone opens a wall. At Moser Electric, we use it the same way: to set expectations, then replace it with a real scope. Many homeowners ask for this figure first. That is fair. But a square-foot rate hides more than it shows.
A per-square-foot figure generally bundles labor, wire, boxes, breakers, and basic fixtures into one number. It assumes open access and no surprises. Real houses rarely cooperate.
What the Per-Square-Foot Figure Includes
A square-foot rate generally covers standard labor and common materials. That means:
Wire and cable for branch circuits
Outlets, switches, and device boxes
Breakers and basic panel connections
Standard light fixture wiring
Labor for routing through accessible spaces
It assumes the electrician can reach the wiring without major demolition. It also assumes the layout is ordinary.
What It Leaves Out
The number usually skips the expensive parts. Watch out: homeowners often mistake a square-foot estimate for a full quote, then get surprised by the extras.
Common exclusions include:
Drywall or plaster repair after wire removal
Panel upgrades beyond a basic swap
Concealed conditions like old knob-and-tube wiring
Permits and inspection fees
Specialty fixtures, EV outlets, or generator hookups
Those items can swing a project far more than home size does. That is the first thing most guides get wrong.
Using a Whole House Rewiring Cost Per Square Foot Calculator
A whole house rewiring cost per square foot calculator is a tool that multiplies your home’s square footage by a rate to produce a rough budget range. It is useful for early planning and not a final number.
Treat the output as a starting point, not a bid. Here is how a homeowner can use one:
Enter total finished square footage, not lot size.
Pick a rate that matches an older home, not a new build.
Add a contingency for concealed conditions.
Subtract any rooms already rewired recently.
Compare the result against full written quotes.
The calculator cannot see your walls. It cannot see a finished basement or a plaster ceiling. So the number it gives you is a ceiling and floor at once: a range, not a promise.
If you have quick cost questions before you go further, our frequently asked questions cover the common ones.
Cost to Rewire a 2,000-Square-Foot House
The cost to rewire a 2,000-square-foot house depends far more on access and wiring type than on the number 2,000. Two homes of identical size can land in very different places. One has open framing and modern cable. The other has plaster walls and decades-old wiring buried behind them.
That is why a single per-square-foot rate is misleading. The useful version is a range tied to a stated assumption. Here is how the same 2,000 square feet breaks down in practice, using round planning figures rather than a bid:
Scenario
Access
Typical Scope
Planning Rate per Sq Ft
Illustrative 2,000 Sq Ft Range
Newer home, partial rewire
Open or easy
Select circuits only
Lower band
Lower total
1970s home, full rewire
Finished walls
Full remove and replace
Middle band
Middle total
Pre-1950 home, knob-and-tube
Plaster, concealed
Full rewire plus repair
Highest band
Highest total
What matters is that the scope changes with the home’s condition and access. A 2,000-square-foot home with open attic and basement access is a different job from the same square footage with plaster ceilings and no attic.
Open-Stud Work vs. Finished-Wall Retrofits
The single biggest swing in a 2,000-square-foot estimate is whether the walls are open. Open-stud work lets an electrician drill and route quickly. Finished-wall retrofits require fishing cable through cavities, cutting access holes, and patching afterward.
If you are unsure how your home fits, describe the wall type and attic/basement access when you request an estimate, and the scope can be narrowed before anyone opens a wall.
Watch out: a flat per-square-foot quote is only as good as the assumptions behind it. Ask what access, wiring type, and repair scope the rate assumes before you compare it to another bid.
Why the Same Square Footage Produces Different Quotes
Two electricians can quote the same 2,000-square-foot home and land far apart without either being wrong. One may include wire removal and drywall patching; the other may list them as extras. One may price a panel upgrade; the other may assume the existing panel is adequate.
The assumptions matter more than the square footage. Labor rates, travel, housing stock, and contractor availability can all shift a quote, which is why any per-square-foot average should be treated as a starting point and replaced with a written scope for your address.
What Drives the Price: Home Age, Wiring Type, and Access
Home age, wiring type, and wall access drive the final price more than square footage ever will. Electrical work generally prices in risk and labor, and both tend to climb in older homes.
Electrician inspecting old wiring inside a wall during a whole house rewiring project
Old Wiring, Knob-and-Tube, and Concealed Conditions
Older homes hide the real cost inside the walls. Knob-and-tube wiring, aging insulation, and undersized circuits all add labor.
That uncertainty is why a sound older-home estimate separates known scope from contingency. Known scope covers the circuits, devices, and panel work that can be priced from a walkthrough.
Watch out: if a quote for an older home has no contingency line and no stated assumptions about concealed conditions, the number is likely to move once work begins.
Finished Walls, Plaster, and Drywall Repair
Finished walls slow everything down. Plaster is harder to open and patch than drywall, and patching plaster to match an existing texture takes more skill and time. Every outlet and switch means cutting, fishing wire, and repairing afterward. Wall access and drywall repair are line items, not footnotes.
The practical sequence is access, routing, then repair. An electrician opens the wall and routes the cable, and the patch work is scheduled separately. A common mistake is budgeting for wiring only and forgetting the patching. Plan for both, and ask each bid whether patching is included or excluded.
How to Compare Electrician Quotes on These Drivers
Because the drivers above vary by house, the fairest comparison is a scope checklist rather than a total. Ask each contractor to confirm, in writing, whether the quote covers wire removal, panel work, patching, permits and inspection fees, cleanup, and any contingency for concealed conditions. A low total that omits patching or permits is not cheaper, it is incomplete. A higher total that itemizes those items is easier to trust and easier to compare against the next bid.
Whole-House Rewiring Timeline and Panel Upgrades
A whole-house rewiring timeline usually runs from several days to a few weeks, depending on size, access, and whether the panel is upgraded at the same time. Occupied homes generally take longer because the work must be scheduled around daily life.
Panel upgrades often travel with rewiring. We handle panel upgrades and panel changes as part of the same project, so you are not hiring twice.
A rewiring project generally moves in stages:
Assessment and permit filing
Rough wiring and wire removal
Panel work
Inspection
Fixture and device finish
Weather and concealed conditions can shift the timeline, so a firm date should be confirmed in writing.
Whole-House Rewiring Permits and Inspections in Virginia
Whole-house rewiring permits and inspections in Virginia are required for this kind of work, and skipping them is a mistake you cannot undo cheaply. Local permitting and inspection rules govern how the job is filed and checked.
The permit protects you. It creates a record that the work was inspected against the applicable code. It also matters when you sell the home.
Permitting and inspection scheduling are generally part of a rewiring project, and the scope should confirm who handles them. To confirm what applies to your address, check with the local authority having jurisdiction.
How to Compare Electrician Quotes Line by Line
Comparing electrician quotes line by line is the single best way to avoid surprise charges. A low total often hides missing scope. A higher total sometimes includes work the cheap bid left out.
Before you commit, look at current coupons and special offers so you know what is available. Then compare quotes on these points:
Is wire removal included, or extra?
Are permits and inspection fees listed?
Is drywall or plaster repair in scope?
What is the panel upgrade cost, itemized?
Is there a written contingency for concealed conditions?
What warranty covers the work?
Ask each contractor to explain any line you do not understand. A reputable contractor should walk you through it. If a quote is vague on scope, treat it as incomplete, not cheap.
Request a Rewiring Estimate from Moser Electric
A real estimate beats a square-foot guess every time. We have over 21 years of experience. We provide professional recommendations and let you make the final call on your electrical solutions.
We aim to be respectful guests in your home. You can expect support from initial design to installation completion, with clear scope.
Start with our residential service to confirm scope and request your estimate.
Rewiring an older home is a big decision, and the square-foot number will only take you so far.
Frequently Asked Questions
What is the average cost to rewire a 2,000 square foot house?
There is no single national average that applies to every home, because the total depends on wiring condition, wall access, panel capacity, and local labor rates. A 2,000-square-foot house with open attic and basement access costs far less than one with plaster walls and no crawlspace. The honest answer is that whole house rewiring cost per square foot is a planning starting point, not a fixed rate. Ask for a room-by-room scope so you can see what is included before comparing totals.
Does whole-house rewiring include a panel upgrade?
Not always. Many quotes treat the electrical panel as a separate line item, especially when the existing panel is undersized or already full. A whole-house rewire usually assumes the panel can carry the new circuits. If your home has a 100-amp panel and you are adding circuits for a heat pump, EV charger, or finished basement, budget for a panel upgrade alongside the rewiring. Confirm in writing whether the panel, meter base, and grounding are inside or outside the quoted scope.
How long does a whole-house rewiring take?
Most occupied homes take several days to a few weeks, depending on size, access, and how much wall repair is needed. Expect the crew to work in phases so power stays on to essential circuits. Homes with open framing, attics, and basements move faster. Plaster walls, concealed junctions, and unexpected repairs add days. Ask your electrician for a phase-by-phase whole-house rewiring timeline with a rough date for inspection scheduling, since Virginia inspections depend on inspector availability.
Do I need a permit to rewire a house in Virginia?
Yes. Rewiring work in Virginia requires a permit from the local building department, followed by inspections before walls are closed up. The exact process and fees vary by locality, so confirm requirements with the authority having jurisdiction for your address. The electrical contractor’s scope should state who pulls the permit and schedules inspections. Never accept a quote that proposes skipping the permit to save money, because unpermitted work can complicate insurance claims and a future home sale.
A whole home generator can be made quieter by placing it away from bedrooms and neighbors, isolating vibration with rubber pads, and keeping the factory muffler and exhaust in good condition. Any enclosure must preserve airflow, since blocking ventilation can overheat the unit and create fire risk.
Measure baseline noise in dBA at the property line and nearest bedroom window before changing anything.
Point exhaust and air intake away from living spaces, since sound travels in the direction openings face.
Use isolation pads rated for the unit’s full operating weight plus a safety margin.
Never enclose a generator in a space connected to a basement, crawlspace, or attached garage.
Call a licensed technician if the generator suddenly makes a new sound, since it may be mechanical.
Is your generator too loud for your home?Moser Electric checks placement, clearances, and maintenance for safer, quieter whole-home generators.
Why Whole-Home Generators Get So Loud and What Counts as Too Loud
A whole-home generator can be quieter than you think, but only if you understand where the noise comes from. To see how the power demand in your home affects how hard the unit works, read how electricity is distributed throughout a home.
Noise is measured in decibels, usually shown as dBA. A standby unit can sound quite loud when it runs under load. Quiet models are designed to produce less sound, and some manufacturers publish sound pressure levels for their units.
Here is what most people consider too loud:
Noise that wakes sleeping rooms at night
A hum that carries across the lot to neighbors
Vibration you can feel through walls or the ground
Sound that continues long after the outage ends
Remember that your local rules may set a limit. Local noise ordinances may cover generators, so check with the local office before you make big changes.
Start With Placement: Distance, Orientation, and Living Areas
Placement is often one of the simplest steps to take. Put the unit as far from bedrooms, living areas, and neighbors’ windows as your lot allows.
Electrician inspecting a whole home generator pad beside a suburban house near bedroom windows
Point the exhaust and the air intake away from living spaces.
Common placement mistakes include:
Setting the unit right beside a deck or patio
Placing it in a corner where walls reflect the sound back
Blocking the airflow with shrubs, sheds, or fences
Keep clearances set by the manufacturer. Blocking airflow can overheat the engine and create a fire risk, so never crowd the unit into a tight space.
DIY Whole Home Generator Noise Reduction That Stays Safe
Whole-home standby generators present different noise challenges than portable units. Standby units run automatically during outages and typically exercise on a schedule, so their noise can recur. Any DIY fix should be checked against both steady running noise and short exercise cycles.
Before changing anything, establish a baseline. Use a sound level meter to measure dBA at the property line, at the nearest bedroom window, and at a set distance from the unit. Take readings during an exercise cycle and under load if possible.
Vibration Isolation and Rubber Mounting Pads
Vibration travels through the concrete pad and into the ground, where it can re-radiate as low-frequency hum inside the house. Rubber isolation pads or spring isolators placed under the generator base can interrupt that path. Choose pads rated for the unit’s full operating weight plus a safety margin. Check that the pads remain level and do not compress unevenly. Inspect them each season for cracking or flattening, and re-torque the mounting bolts to the manufacturer’s specification.
Sound-Absorbing Panels and Acoustic Barriers
Acoustic panels and barriers work best when placed between the generator and the sensitive receiver, not wrapped around the unit. A solid fence or wall at least as tall as the generator, set back from the unit by the manufacturer’s clearance, can block line-of-sight sound. Mass-loaded vinyl or outdoor-rated acoustic blankets hung on a frame can absorb mid- and high-frequency noise, but they do little for low-frequency engine rumble. Position barriers so they do not reflect sound toward a neighbor or trap heat around the unit.
Exhaust and Muffler Considerations
Most whole-home generators come with a factory muffler and enclosure designed to meet a published sound rating. Replacing or modifying the exhaust can void the warranty and may violate local code. If the muffler is rusted or leaking, replace it with the manufacturer’s specified part rather than a generic automotive muffler. A leaking exhaust is both louder and a carbon monoxide hazard.
Maintenance Steps That Keep Noise Down
A dirty air filter, loose belt, or worn spark plug can make a generator run louder and less efficiently. Follow the owner’s manual schedule for oil changes, filter replacement, and valve adjustment. During each weekly exercise cycle, listen for new sounds: a rhythmic knock, a whistle, or a sudden roar. Treat any change in sound as a reason to call a licensed technician, because it may indicate a mechanical problem rather than a noise problem.
What DIY Cannot Fix
Some noise problems are inherent to the unit’s design, its location, or its installation. If the generator sits on a poorly compacted pad, if the transfer switch or wiring was installed without proper clearance, or if the unit is simply too close to a property line, no amount of pads or panels will fully solve the issue.
The article breaks the main DIY noise fixes into a few categories, each with its own tradeoffs.
Fix
Main benefit
Key caution
Vibration isolation pads
Interrupts vibration through the pad
Over-tightening bolts defeats the isolators
Acoustic panels and barriers
Blocks line-of-sight sound
Must not block intake or exhaust openings
Factory muffler or exhaust
Meets published sound rating
Aftermarket changes can void warranty
Regular maintenance
Keeps unit running smoothly
Any sudden new sound needs a technician
Soundproof Generator Box DIY: Ventilation and Fire Safety Limits
A soundproof generator box is the most dangerous DIY noise fix a homeowner can attempt on a whole-home standby unit. Unlike a portable generator that runs occasionally outdoors, a standby unit runs under heavy load for hours or days during an outage and produces substantial heat. Enclosing it without engineered airflow can cause overheating, component failure, and in the worst case a fire.
Why Whole-Home Units Are Different
A 20 kW standby generator dissipates several kilowatts of heat through its enclosure and exhaust. Factory housings are designed with intake and exhaust openings, airflow, and clearance distances to manage heat. Any added enclosure must preserve or improve that airflow, not restrict it. Portable generator boxes sold online are typically sized for small units and are not rated for the continuous heat load of a whole-home system. Using one on a standby unit is a common and serious mistake.
Minimum Ventilation Requirements
There is no universal formula, but most manufacturers specify minimum clearance on all sides, often 18 to 36 inches, and require that intake and exhaust air paths remain unobstructed. An enclosure must have open intake and exhaust areas at least as large as the generator’s own louver area, and the air path must not recirculate hot exhaust back into the intake. Baffles can reduce noise but increase airflow resistance, so any baffle design must be verified against the unit’s cooling requirements.
Fire Safety and Carbon Monoxide
Generator exhaust contains carbon monoxide, and an enclosure can allow CO to accumulate near the unit and migrate toward the house. Never enclose a generator in a space connected to a basement, crawlspace, or attached garage. Install CO alarms both near the generator and inside the home, and test them monthly. Keep combustible materials, including mulch, firewood, and stored fuel, well away from the enclosure.
What a Safe Enclosure Looks Like
A safe acoustic enclosure for a whole-home generator is typically a professionally engineered structure with a defined air path, fire-rated materials, and a design that has been reviewed against the generator manufacturer’s installation manual. Some manufacturers offer factory-approved acoustic enclosures or sound kits; ask your installer whether one is available for your model. If you want the noise reduction of a box without the risk, ask your installer whether a factory acoustic enclosure or a manufacturer-approved sound attenuation kit is available for your model.
When to Stop and Call a Professional
If you have already built or bought a box and the generator is running hotter than usual, shutting down unexpectedly, or producing a different exhaust smell, stop using the enclosure and have the installation inspected. A licensed electrician or generator technician can measure airflow and temperature, confirm clearances, and recommend a safe alternative. Local officials can advise on permit requirements and noise rules that apply to your property.
Generac Whole Home Generator Noise Reduction Options Compared to Other Providers
Different providers offer different sound ratings, enclosure designs, and accessories. When you compare options, look at the published decibel rating, the enclosure type, and the warranty terms.
Ask each one for the exact sound rating at a set distance, since numbers from different brands are only fair to compare when measured the same way.
Some useful questions to ask:
What is the sound level at 23 feet under load?
Does the enclosure come from the manufacturer?
Does the warranty cover accessories added later?
Best Whole Home Generator Noise Reduction: Muffler, Exhaust, and Maintenance Steps
Good maintenance helps a generator run smoothly. Follow the maintenance schedule in the owner’s manual.
Here are steps that help:
Inspect the muffler and exhaust for leaks or rust each season.
Replace or clean the air filter as the manual directs.
Check the mounting pads and bolts for wear.
Run a test under load and note any new noise.
Call a licensed technician if the sound changes suddenly.
A leak in the exhaust is dangerous as well as loud, so treat any change in sound as a warning sign.
Booking a Professional Assessment in Moneta, VA
If your generator is still too loud after placement and maintenance, a professional assessment can find the cause. A licensed electrician can check the installation and related wiring.
Contact Moser Electric to ask about a site visit before any work starts.
Frequently Asked Questions
How loud is a 72-decibel generator?
A 72 dBA generator is roughly as loud as a normal conversation or a running dishwasher at a few feet away. Whole-home standby units are often rated around this level at 23 feet under load. Sound drops as you move farther away, and walls, enclosures and placement can reduce what reaches living spaces. Compare the manufacturer’s dBA rating at a stated distance before deciding how much mitigation you need, and remember that a rating at full load is usually louder than the unit sounds during a weekly self-test.
Can a generator sound enclosure reduce noise safely?
Yes, if it is designed around airflow. A generator needs large volumes of cooling and combustion air, and an enclosure that traps exhaust heat can cause overheating, shutdowns or fire risk. Any enclosure should keep the manufacturer’s clearances, include intake and exhaust paths sized for the unit, and avoid blocking the exhaust outlet. Factory-approved sound enclosures are one option to consider over homemade boxes for this reason, and a licensed electrician or the generator dealer can confirm clearances before work starts.
When should I call an electrician about excessive generator noise?
Call a licensed electrician if the generator runs louder than its rated level, vibrates the house, shows signs of loose mounting, or if you suspect an electrical fault such as a transfer switch problem or a wiring issue behind the noise. Noise that changes suddenly often points to a mechanical or electrical problem rather than a sound issue. Contact Moser Electric directly for a quote and current details on pricing and availability.
Does the generator’s location affect how loud it sounds inside the house?
Yes. A generator placed close to bedroom windows, under eaves or in a corner between two walls can sound much louder indoors than one placed on the far side of the property. Keeping the unit as far from living areas as your installation and local setback rules allow, facing the exhaust away from windows, and mounting it on a level pad usually makes the biggest difference. Placement changes are often the cheapest noise reduction step available.
Power surges don’t just come from lightning—they can happen when large appliances cycle on, from utility grid issues, or during storms. These surges can silently damage TVs, computers, appliances, and your home’s electrical system.
A whole-house surge protector is installed at your electrical panel and helps:
✅ Protect all electronics at once ✅ Prevent costly appliance damage ✅ Extend the life of your electrical system ✅ Add an extra layer of safety for your home
Don’t wait until a surge causes damage.
📞 Call Moser Electric LLC to ask about whole-house surge protection. Proudly serving Lynchburg, Moneta, and surrounding areas.
Why Does My Light Switch or Outlet Feel Warm to the Touch?
A warm light switch or outlet can be concerning—and in some cases, it should be. At Moser Electric LLC, we help homeowners throughout Lynchburg, Moneta, Smith Mountain Lake, Bedford, Forest, and surrounding areas understand when warmth is normal and when it’s a serious safety issue.
When Warmth Can Be Normal
Dimmer switches may feel slightly warm during use. This is normal due to how dimmers regulate electrical current. The warmth should be mild and never hot.
When Warmth Is a Warning Sign
If any outlet, standard light switch, or electrical panel component feels hot to the touch, this is not normal and should be addressed immediately. Common causes include:
Overloaded circuits
Loose or damaged wiring
Failing outlets or switches
These conditions can create a serious fire hazard if left unchecked.
What You Should Do
If you notice heat, discoloration, buzzing, or a burning smell, stop using the outlet or switch and contact a licensed electrician right away.
Call Moser Electric LLC for Immediate Electrical Safety Service
Our licensed electricians diagnose and repair overheating electrical components to protect your home and family.
📞 Contact Moser Electric LLC today for electrical safety inspections and repairs in your area.
Warm outlet, hot light switch, electrical safety inspection, overloaded circuit repair, licensed electrician near me, Lynchburg VA electrician, Moneta VA electrician
Why Do Outlets in Kitchens and Bathrooms Need Special Protection?
Outlets located near water pose a higher risk of electric shock. That’s why kitchens, bathrooms, outdoor areas, and other damp locations require Ground Fault Circuit Interrupter (GFCI) protection. At Moser Electric LLC, we help homeowners throughout Lynchburg, Moneta, Smith Mountain Lake, Bedford, Forest, and surrounding areas keep their homes safe and code-compliant.
How GFCI Protection Works
GFCI outlets continuously monitor the flow of electricity. If the device detects an interruption or imbalance in the current—such as electricity flowing through water or a person—it shuts off power instantly to prevent serious or potentially lethal electric shocks.
Where GFCI Protection Is Required
Kitchens
Bathrooms
Laundry rooms
Garages
Exterior outlets
Near sinks or water sources
Why GFCI Protection Matters
Without proper protection, outlets in wet areas significantly increase the risk of shock and injury. GFCI outlets are required by electrical code and are a critical safety feature in modern homes.
Call Moser Electric LLC for GFCI Installation & Inspection
Our licensed electricians install, test, and replace GFCI outlets to ensure your home meets current safety standards.
📞 Contact Moser Electric LLC today for GFCI outlet installation and inspections in your area.
GFCI outlet installation, kitchen GFCI outlets, bathroom GFCI outlets, electrical safety inspection, licensed electrician near me, Lynchburg VA electrician, Moneta VA electrician, Smith Mountain Lake electrician
What Is the Standard Electrical Service Capacity for a Home?
Your home’s electrical service capacity determines how much power your system can safely handle. At Moser Electric LLC, we help homeowners throughout Lynchburg, Moneta, Smith Mountain Lake, Bedford, Forest, and surrounding areas understand whether their electrical service meets modern demands.
Common Electrical Service Sizes
100-Amp Service This is the minimum required by the National Electrical Code (NEC) for most modern homes and supports basic electrical needs.
200-Amp Service Now standard in many newer homes, 200-amp service provides the power needed for today’s appliances, HVAC systems, EV chargers, and home upgrades.
60-Amp Service (Older Homes) Often found in older properties, 60-amp panels are outdated and may not safely support modern electrical loads. These systems commonly require an upgrade.
Why Electrical Service Capacity Matters
Insufficient service can lead to:
Frequent breaker trips
Flickering lights
Overloaded circuits
Increased fire risk
Upgrading your electrical service improves safety, reliability, and code compliance.
Call Moser Electric LLC for a Professional Evaluation
Our licensed electricians evaluate electrical service capacity and perform safe, code-compliant upgrades for homes throughout Central Virginia.
📞 Contact Moser Electric LLC today for electrical service upgrades in your area.
Electrician near me, electrical service upgrade, 200 amp service upgrade, licensed electrician, residential electrician, electrical panel upgrade, Lynchburg VA electrician, Moneta VA electrician, Smith Mountain Lake electrician, Bedford VA electrician, Forest VA electrician
Hiring the wrong electrician can cost more than money—it can put your home and family at risk.
❌ Shortcuts taken ❌ Work not up to code ❌ Ongoing electrical problems ❌ Increased fire and shock hazards ❌ Paying twice to fix poor workmanship
Electrical work should never be a gamble.
At Moser Electric LLC, we proudly serve Lynchburg, Moneta, Smith Mountain Lake, Bedford, Forest, and surrounding areas with electrical work done right the first time.
Your home’s electrical panel is the heart of your electrical system. An outdated or overloaded panel can cause frequent breaker trips, flickering lights, and even fire hazards. At Moser Electric LLC in Lynchburg, VA, we provide professional electrical panel upgrades to protect your home and family.
Signs You May Need a Panel Upgrade:
Frequent breaker trips or blown fuses
Flickering or dimming lights
Older panels that can’t handle modern electrical loads
Adding major appliances or home renovations
Benefits of Upgrading Your Panel:
Increased safety – reduces the risk of electrical fires
Improved performance – supports modern appliances and electronics
Code compliance – ensures your home meets current electrical standards
Call Moser Electric LLC in Lynchburg, VA Our licensed electricians handle panel inspections, replacements, and upgrades with precision. Protect your home with a modern, reliable electrical panel.
📞 Contact Moser Electric LLC today for professional electrical panel upgrades in Lynchburg, VA.
We use cookies to ensure that we give you the best experience on our website. If you continue to use this site we will assume that you are happy with it.